Monday, November 25, 2013

Hip Harness


Hey guys,
Here's a basic hip harness to add to your tool kit. It works well in a side-lying or face-up suspension. I like it because it gives a nice "lift" to the butt cheeks and leaves the front bits available for play ;) Have fun with this one!

Tuesday, November 19, 2013

The Burlington Bowline


Howdy riggers,

  Here's a brand spanking new single column tie for your toolbox. I came up with it last month after teaching my Column Theory class at Bound in Boston. In preparation for that event, I had been studying, dissecting, tying, and retying every column tie I could get my hands on for months. One morning after the con, I woke up with serious rope on the brain and just had to dive out of bed for my m0co jute. The problem plaguing me seemed straightforward enough: "How could I keep the much maligned Boola Boola from capsizing without giving up its charms of speed and easy tensioning?"

About 30 minutes of really hacking on this problem led me through some really weird bowline-esque ties resembling a French Bowline gone terribly wrong. There I was, digging myself deeper and deeper into some truly ugly knotwork when suddenly I hit on the key to the solution...

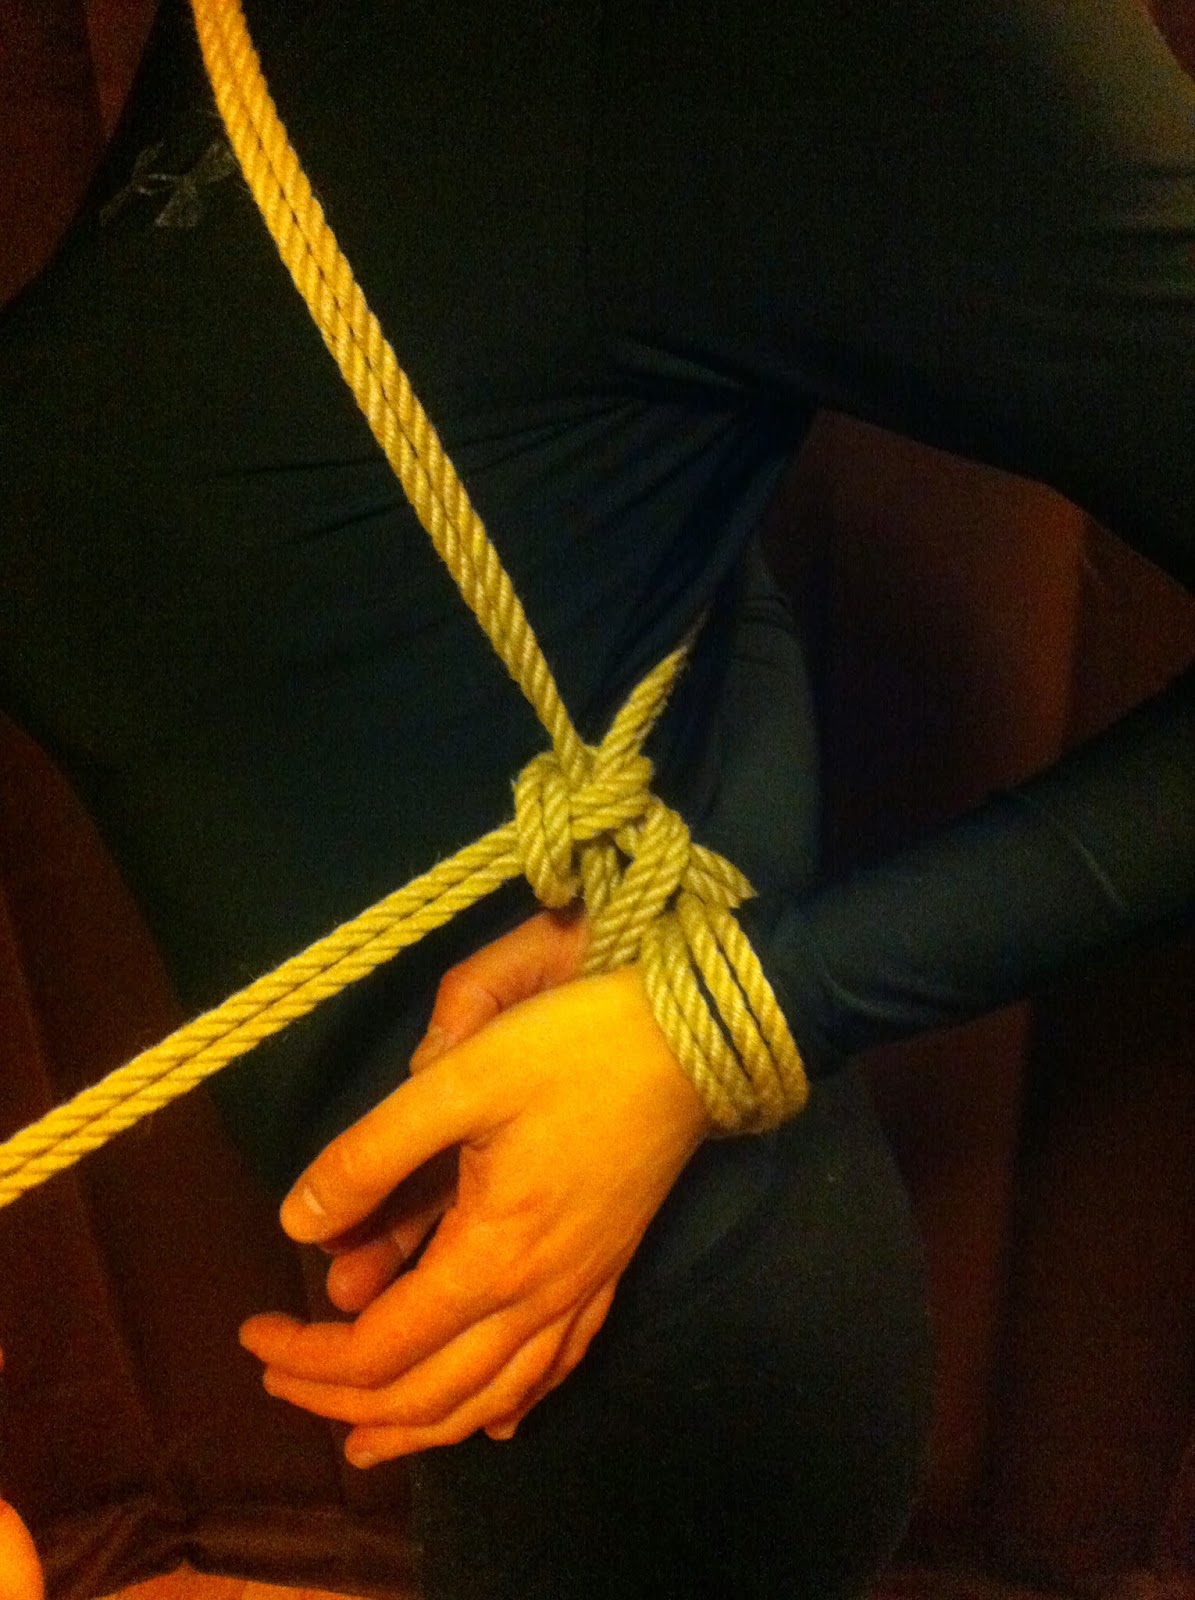
The problem with the Boola Boola is that the loop in the standing end through which the bight is passed to complete the knot is free floating in the line above the bands which wrap the column. Just tie a Boola Boola and pull on the standing end to see what I mean. You can move the knot away from the bands easily by simply applying tension to the rope.

If this knot isn't dressed carefully (or if the rope being used doesn't have much tooth), it is possible that the loop in the standing end will transfer to the bight, thereby turning the final knot into a half hitch with the bight passing around the standing line. If this happens, your previously secure Boola Boola will have just devolved into a collapsing noose. Major fail.

In the end, the solution that came to me was that I needed to fasten the loop in the standing line to the bands wrapping the column. In so doing, the loop can no longer transfer to the bight, and this modified Boola Boola can no longer collapse. Elementary, my dears...

And thus was born the Burlington Bowline...cousin to both the Boola Boola and the Somerville Bowline...fast to tie, easy to tension, and bombproof.

Go get 'em!
  -Tracker-

Tuesday, November 12, 2013

The Inescapable

At some point riggers will come across an eel (or more likely a swarm of them- yes, a group of eels is technically called a swarm- look it up) and those slippery lil suckers will do all they can to get out of the rope that they are put in. For some that is just not worth dealing with but a lot of us see that as a challenge!  I came across such a young lady last year. She could get out of almost anything so I rose to the occasion and came up with this nasty harness that could only be named one thing- The Inescapable!

This tie has been put to the test many times and I have yet to find anyone that can get out of it, if it has been tied properly of course. There are a lot of redundancies built into it to prevent easy escapes. A few things about it though- it is a very harsh tie that can be very challenging on the bottom. It puts the hands in a very uncomfortable position and it might prove to be too much for anyone with shoulder or upper back issues. Please use with caution and be aware of the risks. 

I typically tie this with a 20-25 foot piece of 6mm hemp rope, but the length of the rope will be dependent upon your bottom. If you want it to be even more evil try 4mm hemp or even paracord. REALLY pay close attention to your bottom if you use the thinner rope though- it has the potential to cut off circulation quickly. Remember- you can't play with a broken toy...

With that, here is how to tie it step by step:
Step 1- A lark's head around the wrists behind the back. 


Step2- Reverse tension the rope and bring it through the second Lark's Head. Make sure the Lark's Head is on the outside of the wrists.


Step 3- bring the working end of the rope up between the hands toward the back. Do not lock off if
you want it to become more difficult. Lock off if you wish it to be more sustainable longer
(several people I have played with pointed this out- it really depends on what you are going for.
If it is not locked off then struggling will tighten the rope around the wrists which could shorten the scene
or potentially lead to damage.)

Step 4- bring the wrist tie to one side of their body or the other- it doesn't matter which. 

Step 5- Bring the rope up over the opposite shoulder and around the back returning to the wrists.

Step 6- The rope continues up between the wrists. You can gently pull the rope up to tighten it at this point but be
aware that "cranking" it too fast or hard might cause a lot of pain or discomfort.

Step 7- Form a bight with the rope and bring the bight behind both of the vertical ropes.

Step 8- Pull the working end of the line through the bight and dress the knot.

Step 9- Reverse the direction of the rope and go through the "big hole" formed by the arm.

Step 10- Bring the rope across the back and around the opposite arm. Watch placement here and avoid
placing the rope on the radial nerve. Keeping the rope down on the lower part of the upper arm does this. 

Step 11- Bring the rope back around the other arm and gently draw the arms closer to one another with
the rope. Don't do this fast and please use caution. If you were to do this very quickly and harshly it may
have the potential to pop a shoulder out of joint. It will tighten a bit more shortly as well so keep that in mind. 

Step 12- Pull all of your rope behind the line crossing the back diagonally. 

Step 13- Bring the rope forward and start to "vine" the two lines that hold the arms together. 

Step 14- Continue the vine to the other arm or as far as the remaining rope will allow and finish with a square not
or your vine finish of choice. 

The finished product! The vine between the arms is a great handle and a fantastic way to control the
person tied in this form. At this point it is fun to watch them struggle to get out!
The Inescapable has proven itself to be a fantastic tie for eels. It is very controlling and tends to be very uncomfortable. This lends itself to people more used to challenging positions or to more interesting play like interrogations. It can also have the feet incorporated into it in the kneeling position, a hog tie position or even an ebi tie. Please be very aware of positional asphyxia issues with any of those other ties. Remember that your responsibility as a rigger is to ensure the safety of the person entrusting themselves to you! 

Have fun with The Inescapable and please let us know what you think of it!

Esox 


Wednesday, November 6, 2013

Welcome to IFA!

Welcome rope enthusiasts!

The three of us, Lux, Tracker and Esox, thought that it would be a good idea for the IFA (Innovative Fiber Arts for those of you who don't know) to have a web presence. This would allow us to reinforce the instruction that we provide to those folks who regularly attend our rope practices as well as provide instruction to those not able to attend. We also hope that it will be able to reach a greater audience.

We are all novices at doing some of the things that we will be doing with this blog, especially with video, so please bear with us while we figure it out. We would like to get your feedback about the blog and our in person instruction so please feel free to email us at our new email address: ifaropevt@gmail.com Any questions or comments are welcome! 

Thank you to all of you who have supported us for our first year "in business" as it were. To all the folks who have attended: we can't do it without you! Please keep coming back and telling your friends that it is a good time!
To the VASE Board: Thank you for supporting IFA! We all enjoy providing what we do to the local community and really appreciate all that you do for us and the Vermont BDSM Scene. 

So with that, welcome! We will catch you around and hopefully teach you how to tie up Japanese Nazi Schoolgirls just like the S&M Hunter does!

Lux, Tracker, and Esox